Setup Central address book in Outlook
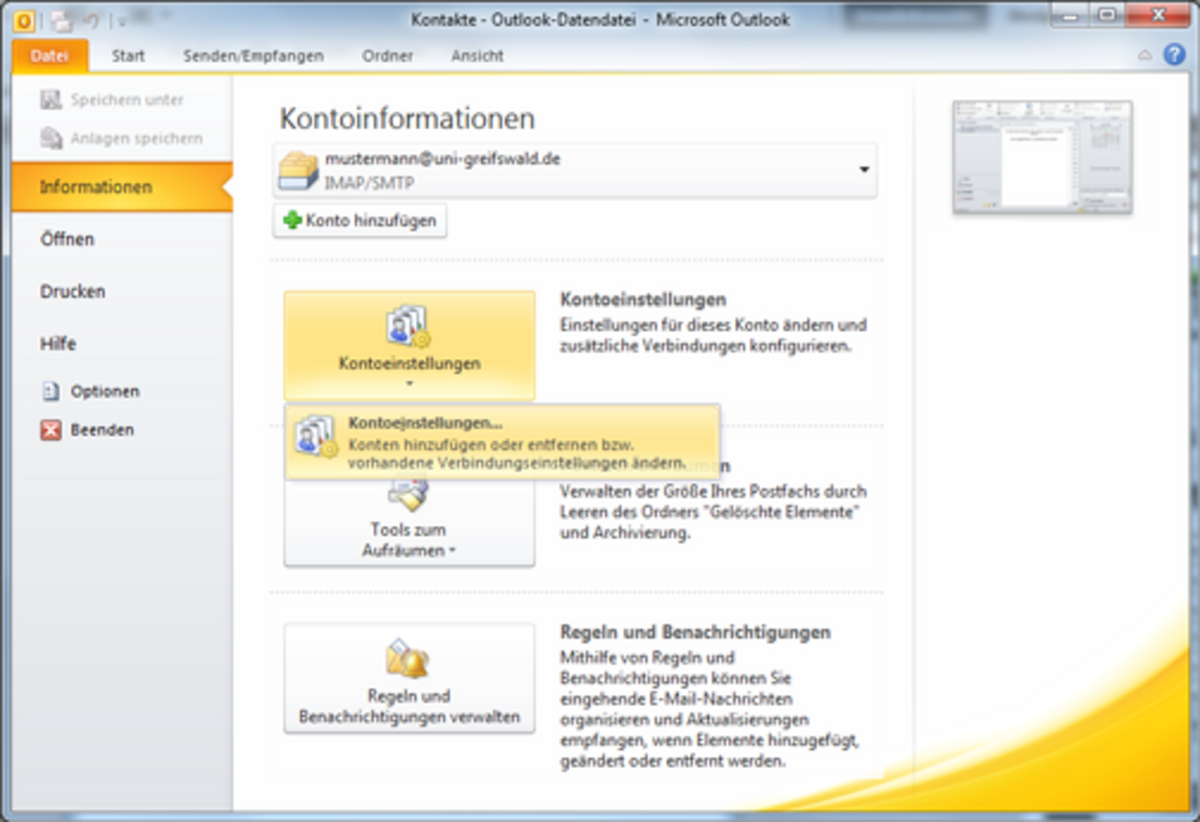
Go to the File menu and select Information on the left-hand side. Then, in the central pane, click on Account Settings (see Figure 1).
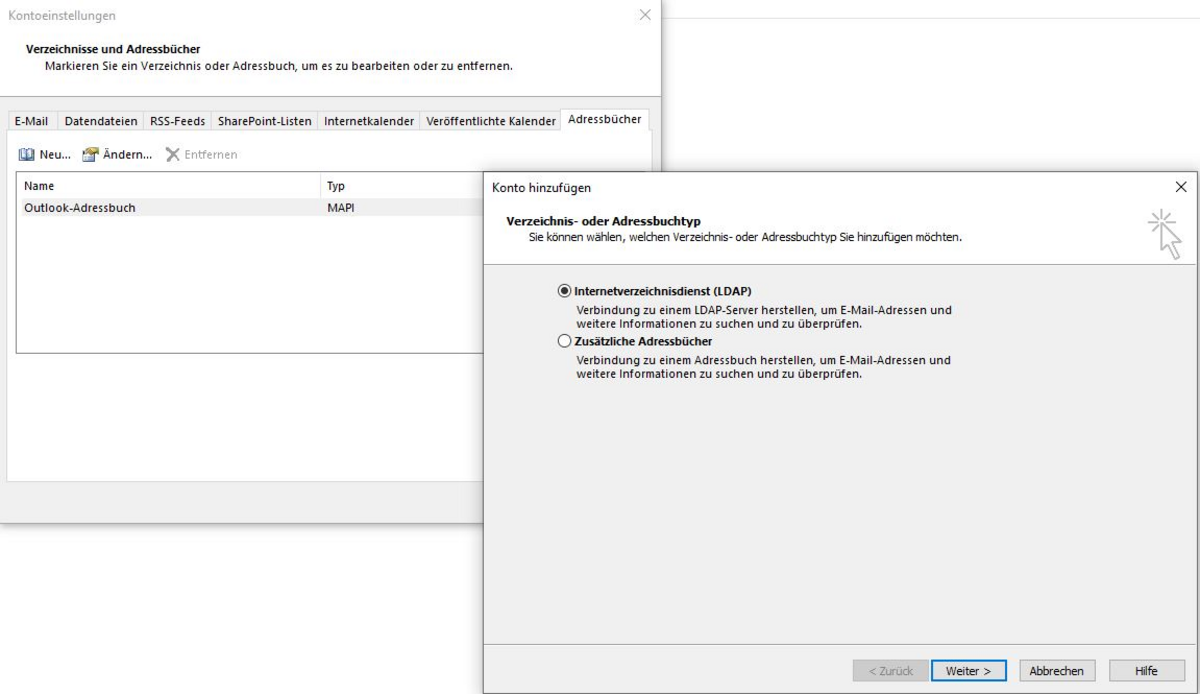
The Address Books tab is now available. Click the New button here to create the central address book. As this is an LDAP directory, select the first option and then click Next in the bottom right-hand corner (see Figure 2).
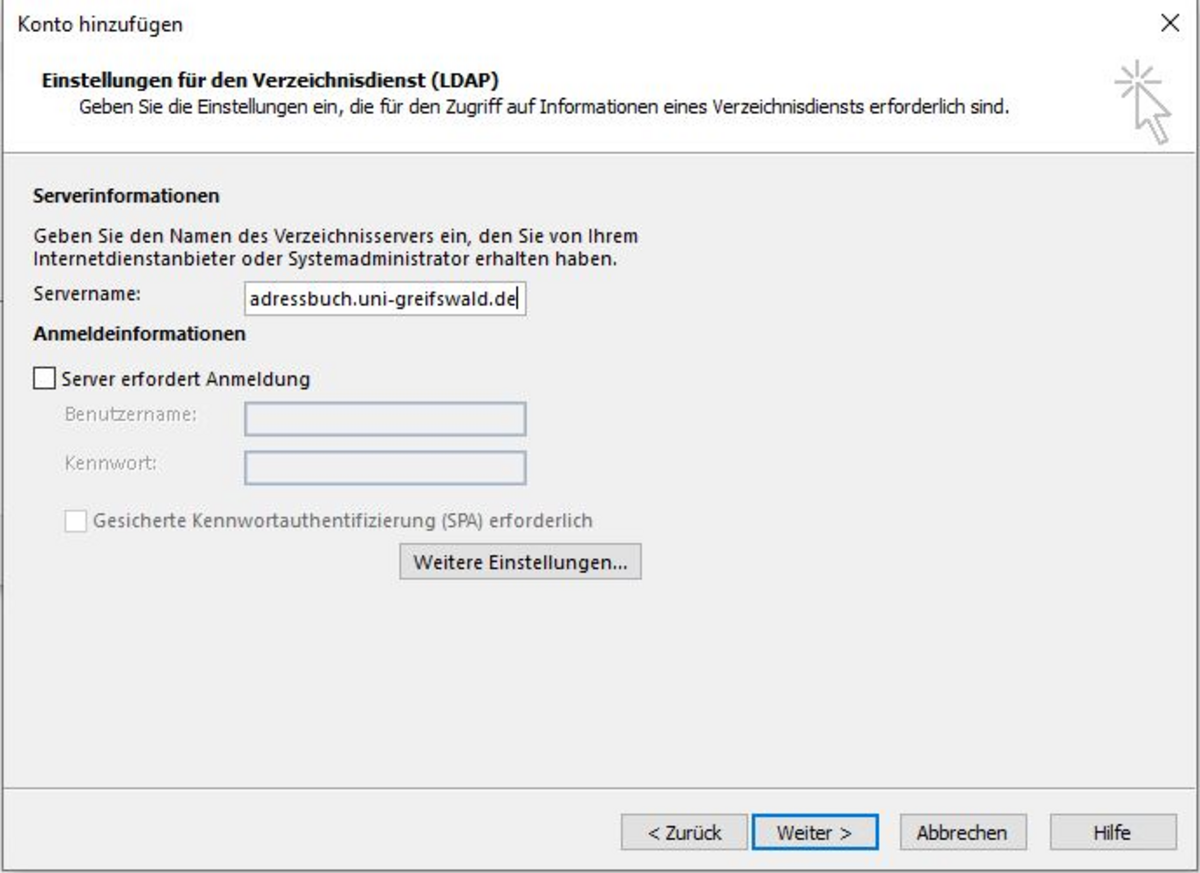
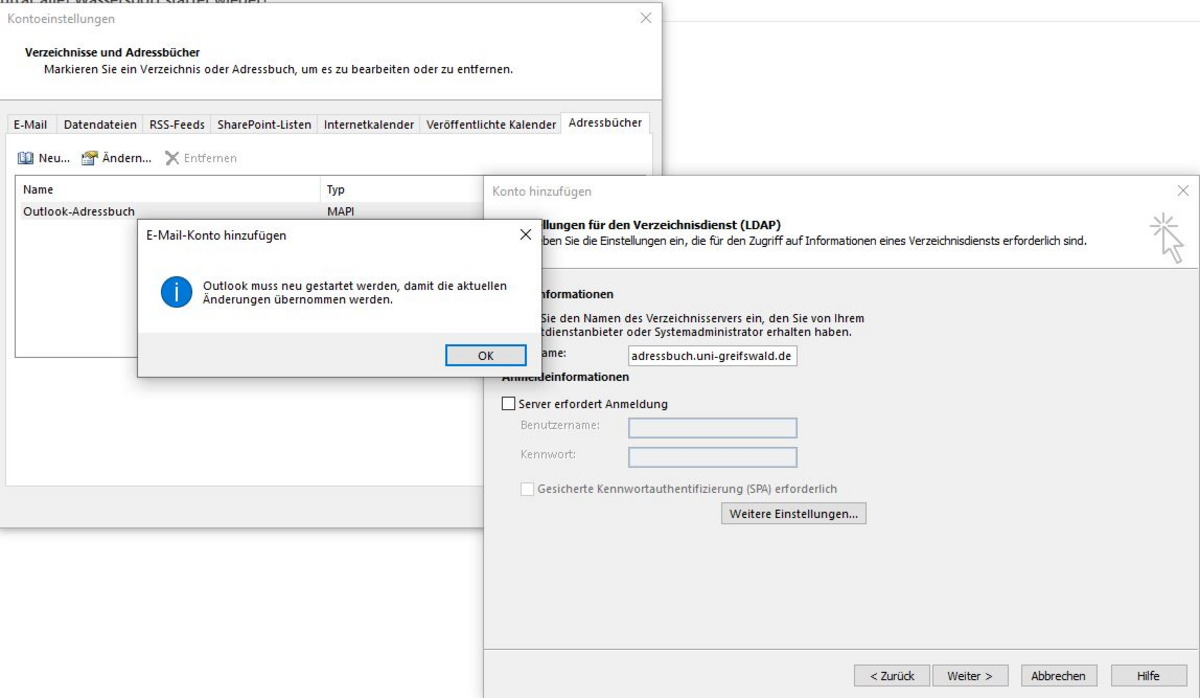
Now enter adressbuch.uni-greifswald.de as the server name and click on Further Settings (see Figure 3). No login details need to be provided.
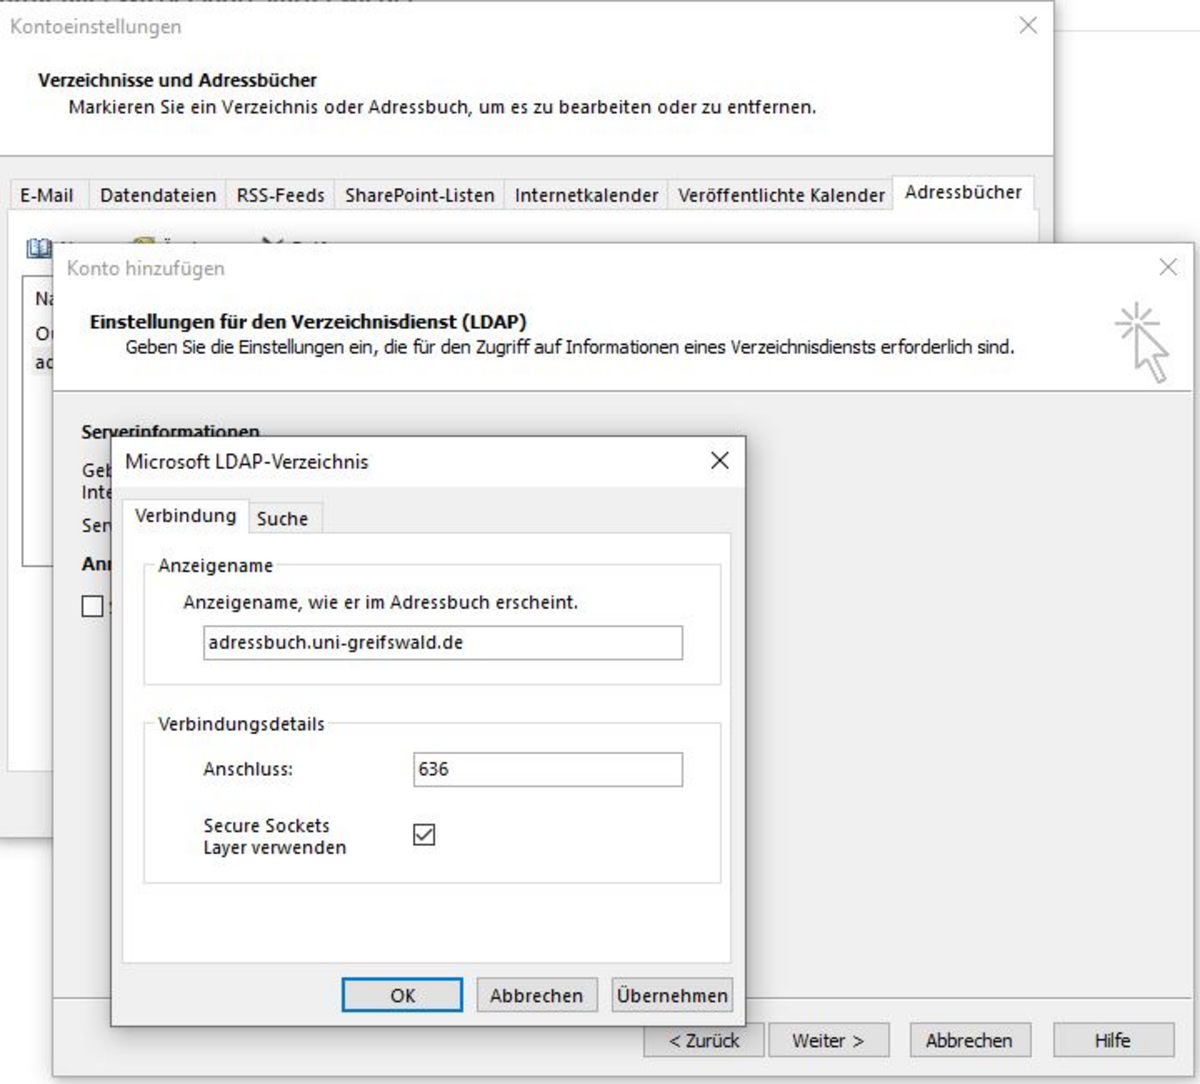
In the next step, you must enter port 636 under Connection and tick the box for Use Secure Sockets Layer (see Figure 4).
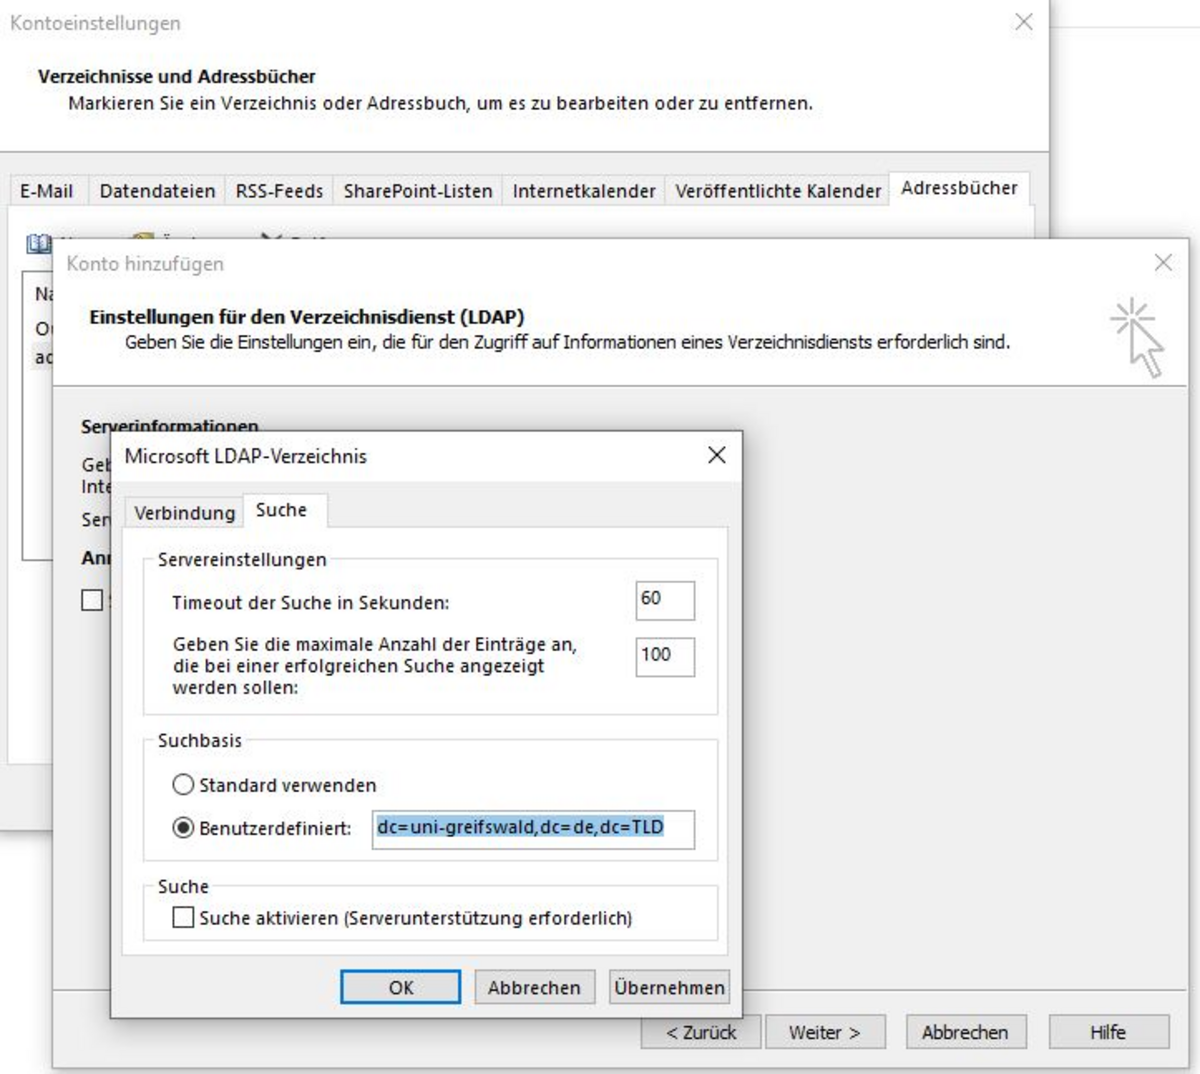
In the final step (see Figure 5), you must specify the search base in the LDAP server. To do this, select the Search tab and enter the following under ‘Custom’: dc=uni-greifswald,dc=de,dc=TLD. Then click Apply.
Now close the window by clicking OK. Then complete the configuration by clicking Next, Finish and Close. You will be prompted to restart Outlook (see Figure 6).
Once Outlook has restarted, the central address book will be available to you.