Setup Central address book in Thunderbird
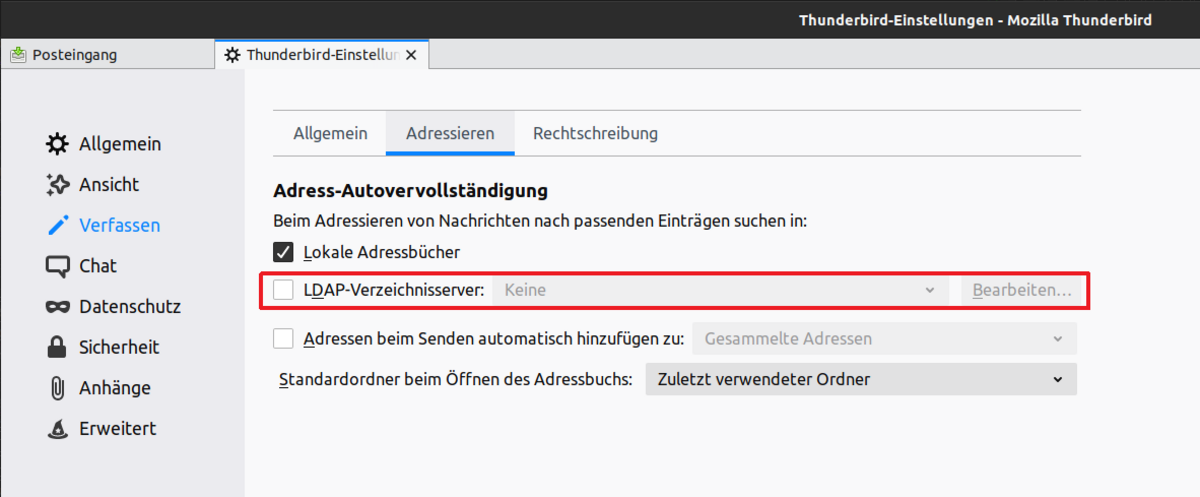
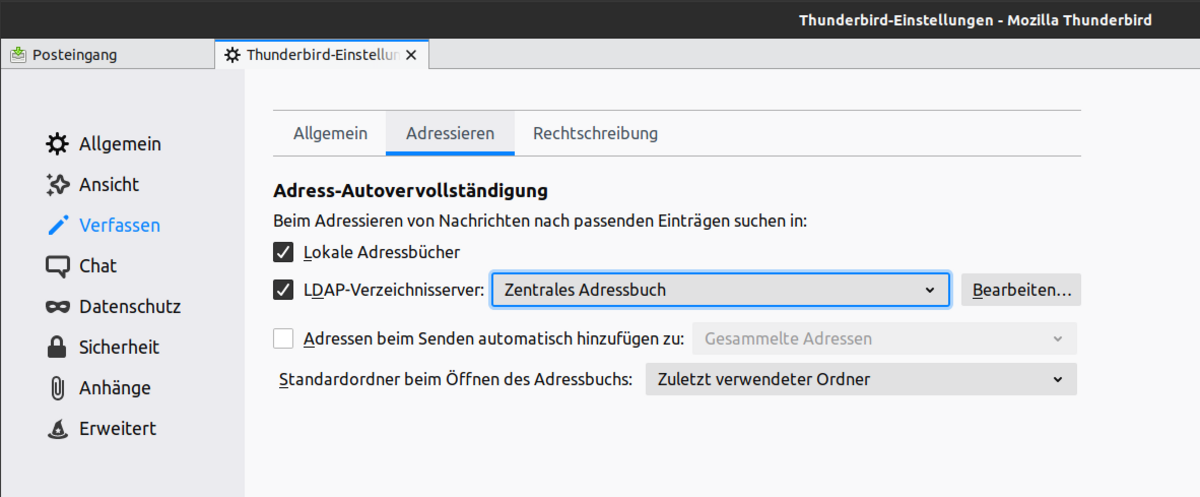
Go to the Thunderbird Preferences. Then select Composition and then the Addressing tab. Here, tick the box next to LDAP Directory Server and click the Edit button (see Figure 1).
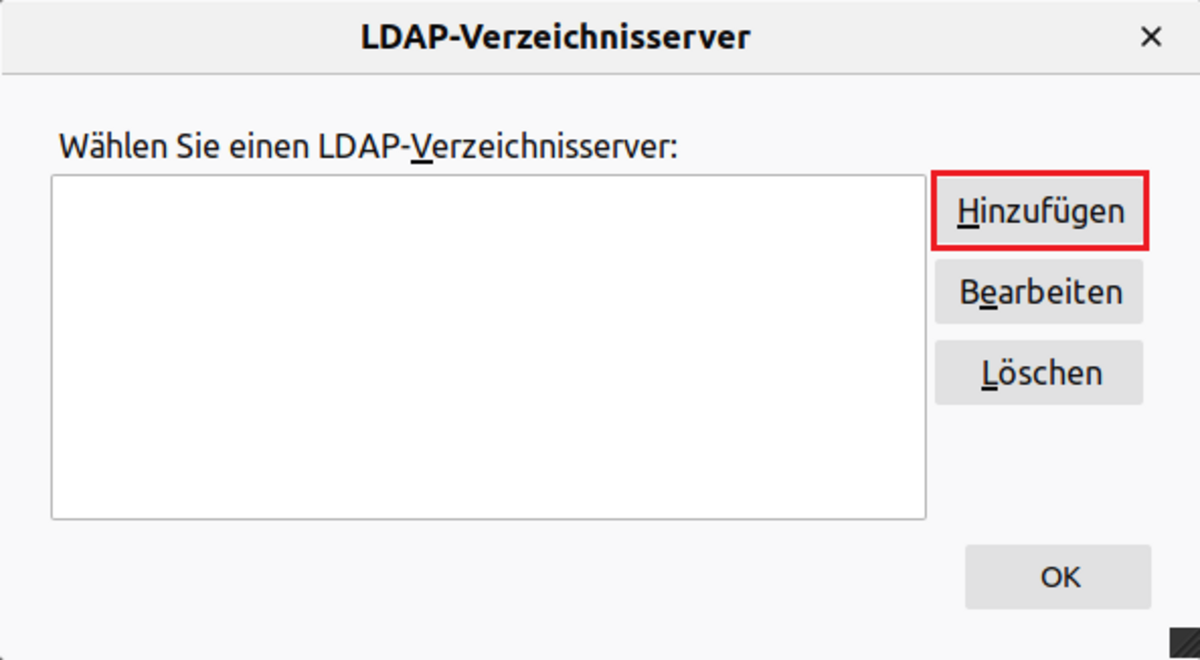
In the following dialogue box (see Figure 2), you can add a new directory server by clicking the Add button.
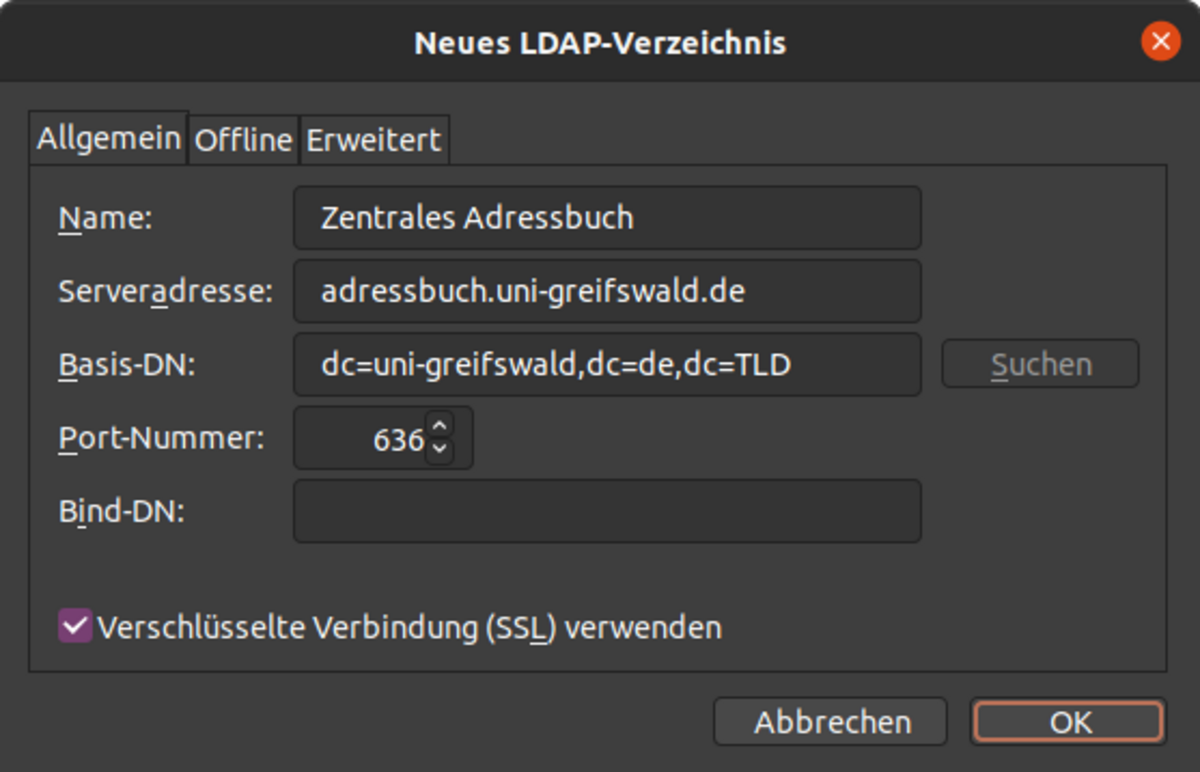
Now enter the required details, as shown in Figure 3 below.
The new directory server will then appear in the list. When you close the list dialogue box, select the university’s central address book as your address book if necessary (see Figure 4).
Connection details
| Parameter | Value |
|---|---|
| Server name | adressbuch.uni-greifswald.de |
| Port | 636 |
| Protocol version | LDAP v3 |
| Encryption | ja (TLS/SSL); Chiffren ab AES 256 |
| Base DN | dc=uni-greifswald,dc=de,dc=TLD |
Figures
Primary email address
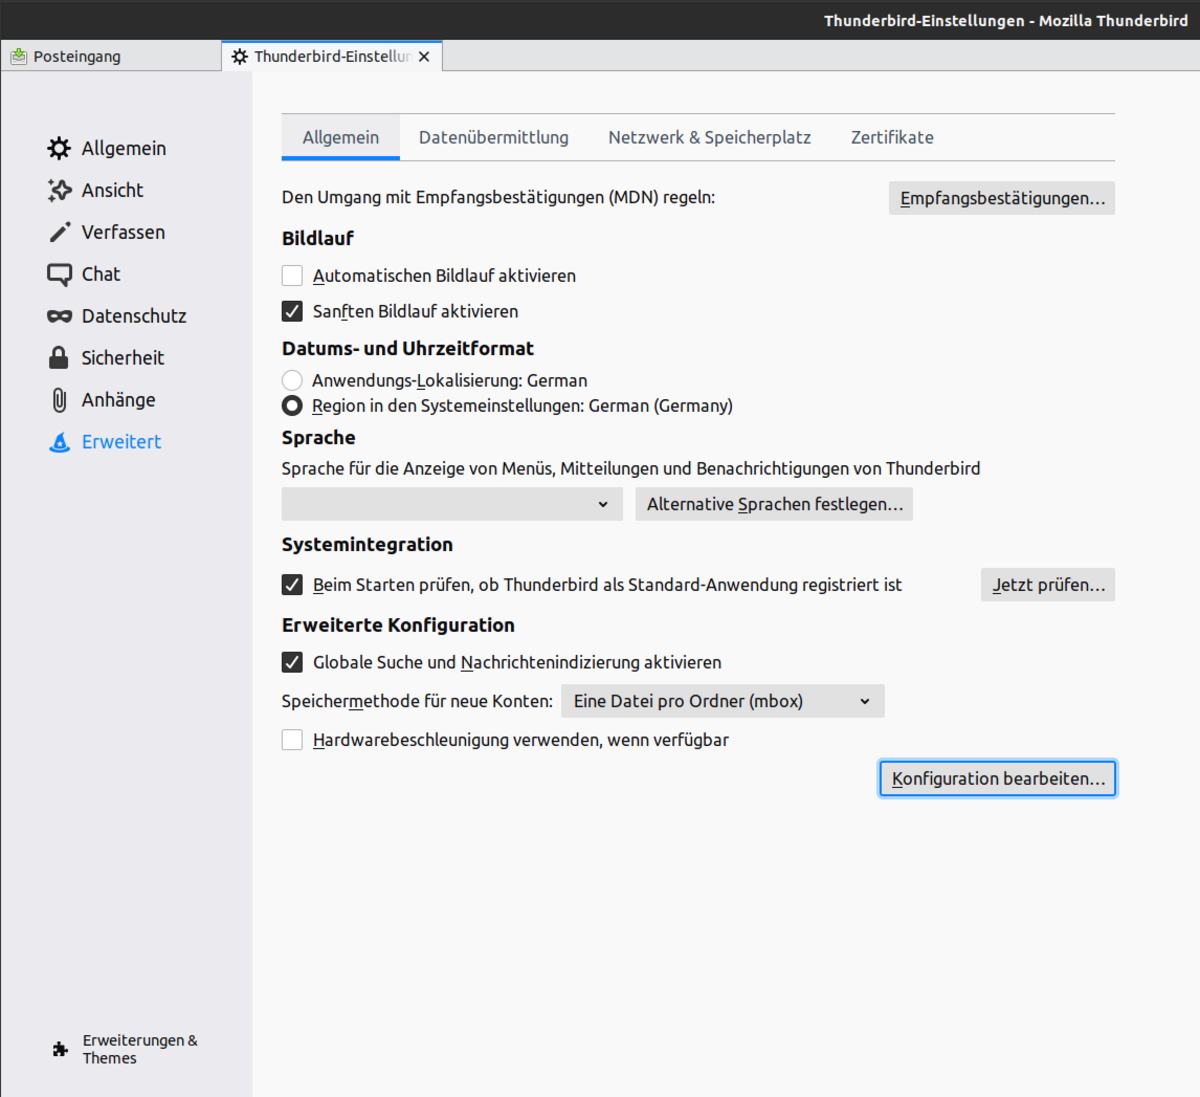
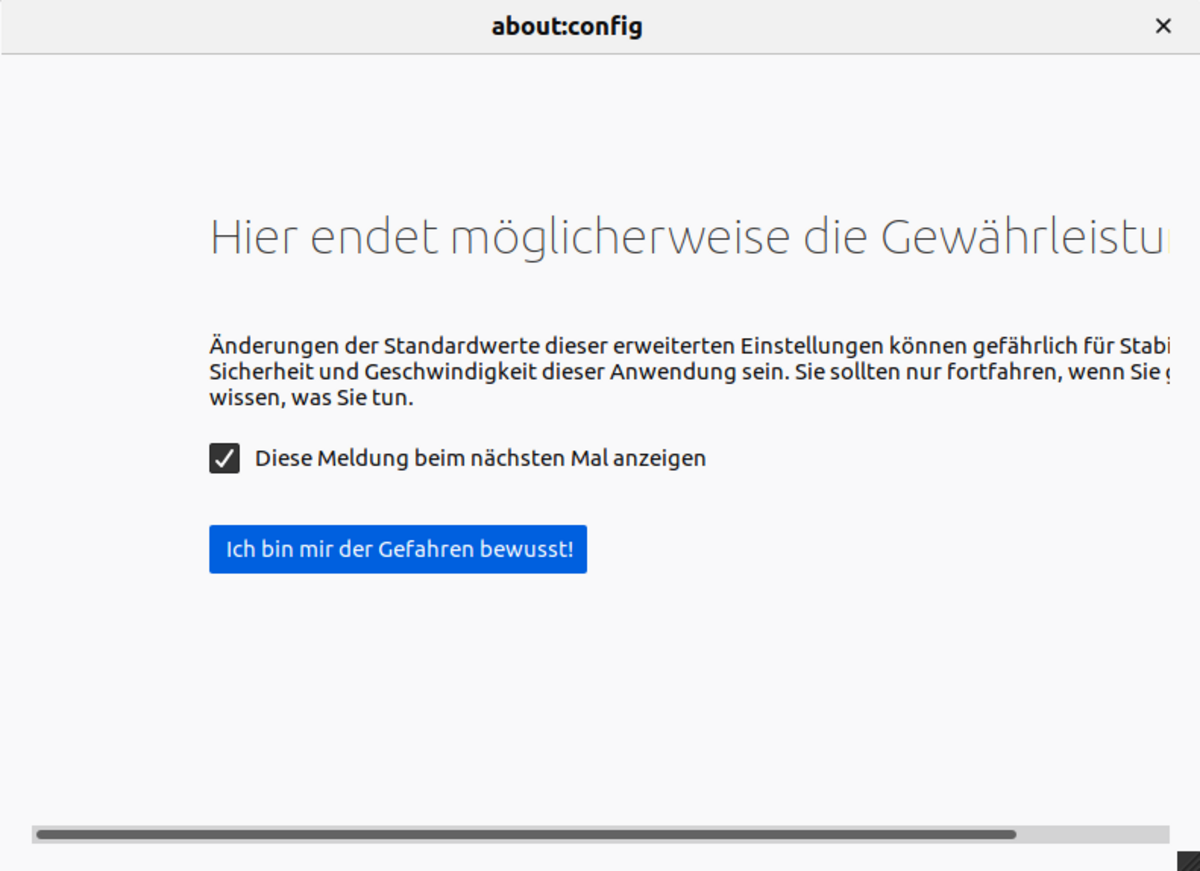
To ensure that the user’s primary email address found in the central address book, this attribute must be set in the Thunderbird settings. To do this, go to the Thunderbird settings, click on Advanced and then on Edit Configuration… (a warning message will appear, which you must confirm by clicking on I am aware of the risks!).
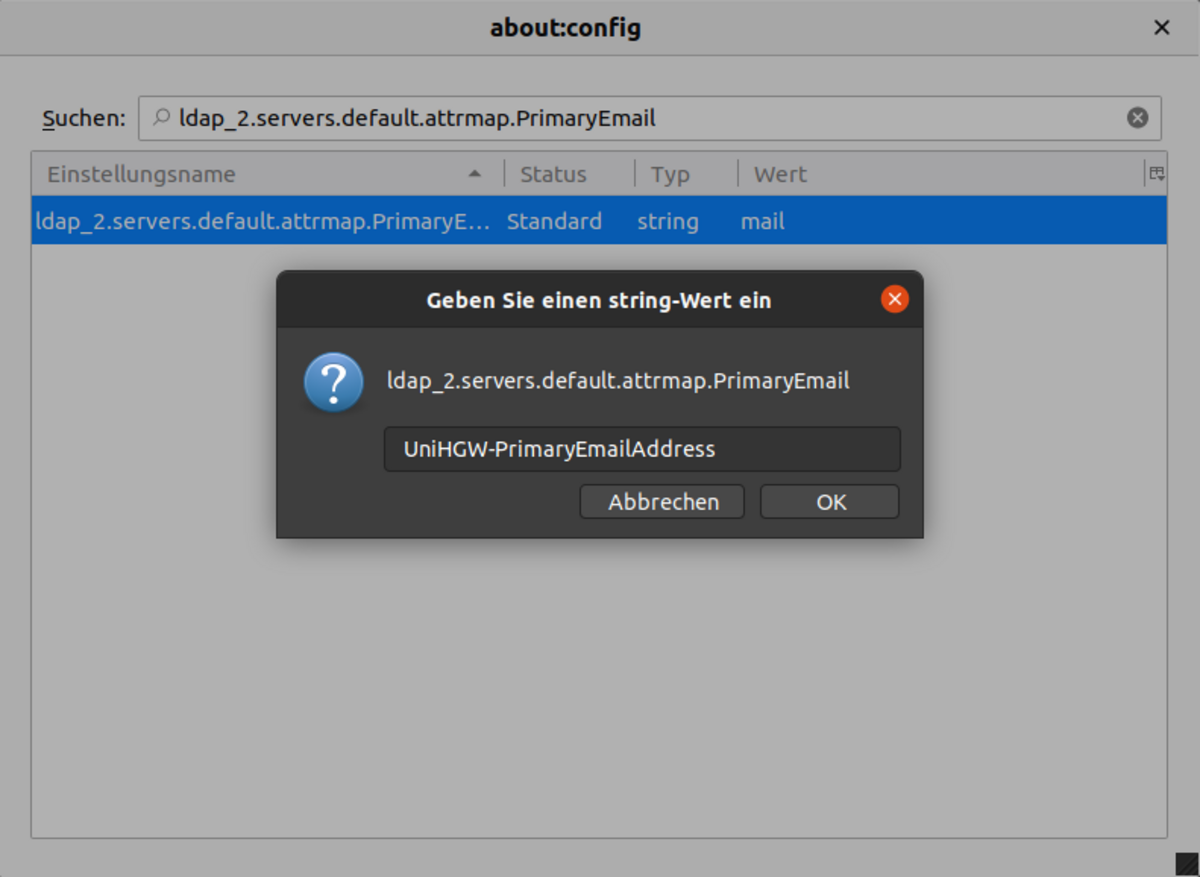
In the search bar at the top, search for the value ldap_2.servers.default.attrmap.PrimaryEmail. By default, this is set to mail. Double-click on the value to change it to UniHGW-PrimaryEmailAddress and confirm by clicking OK.
You can then close all windows and restart Thunderbird once to complete the process.