Print Management System
The University Computer Centre uses PaperCut to provide a central printing management system for the university's staff and all students with the following features:
- central administration of all network’s printers
- the client only requires one printer
- documents are only printed after a successful user authentication
- documents can be printed at any shared printer
- possibility of cost control (e.g. in PC labs)
Installation on Your Client
Two things are required on the client.
- The virtual printer
- The PaperCut client
The Computer Centre officially supports the 64bit versions of Windows 10, Linux (Ubuntu 18.04+), OS-X (Yosemite+)
Installation Guides
Printing with PaperCut

Once the PaperCut client has been installed and the printer has been setup, documents are printed as follows:
The document is sent to the virtual printer. This will open the verification window of the PaperCut client, which requires your central login details. The print job will then be located on the print management system.
There are now two different ways the documents can be printed:
- Users authorise themselves with their staff ID card on the card reader of the printer. Depending on the kind of printer, either all of the user’s documents that are in the waiting list will be printed, or a menu will be displayed with a list of possible documents for users to choose from.
Here you can also verify your print settings (color/greyscale, one-/double-sided).
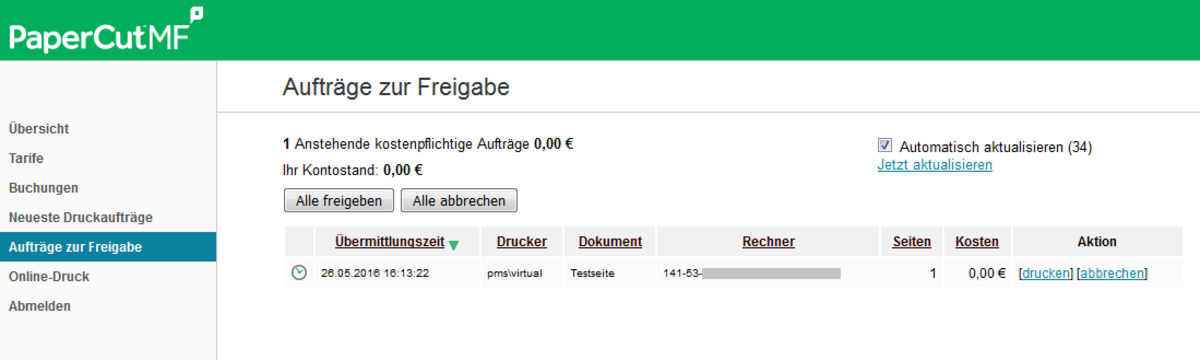
- Users open the PaperCut web client (only available within the university network) and click on Jobs Pending Release in the main menu. In the column titled Action, click on Print and select the desired printer in the next window. The selected printer will then print the document immediately.