Self-enrolment
These instructions explain how you can configure self-enrolment for the students on your course (participant role).
Step by step
- Open your course in the browser (if you have already requested it, you will find a URL in your confirmation email).
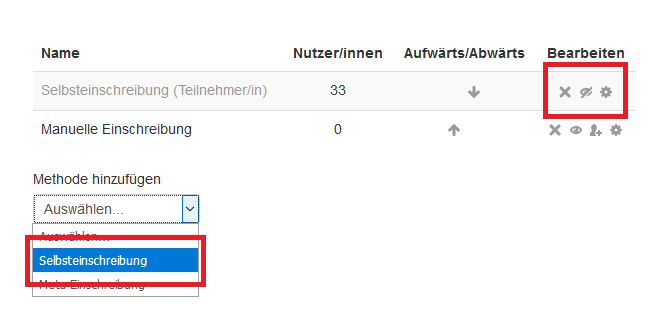
- In the ‘Administration’ block, select the menu item ‘Users’ and then on ‘Enrolment methods’.
- Either select self-enrolment from the ‘Add method’ drop-down menu or activate the method displayed in the overview (if listed) by clicking on the crossed-out eye icon.
- Depending on how you have done this, you will either be taken directly to the configuration parameters, or you can access them by clicking on the cogwheel icon in the list view.
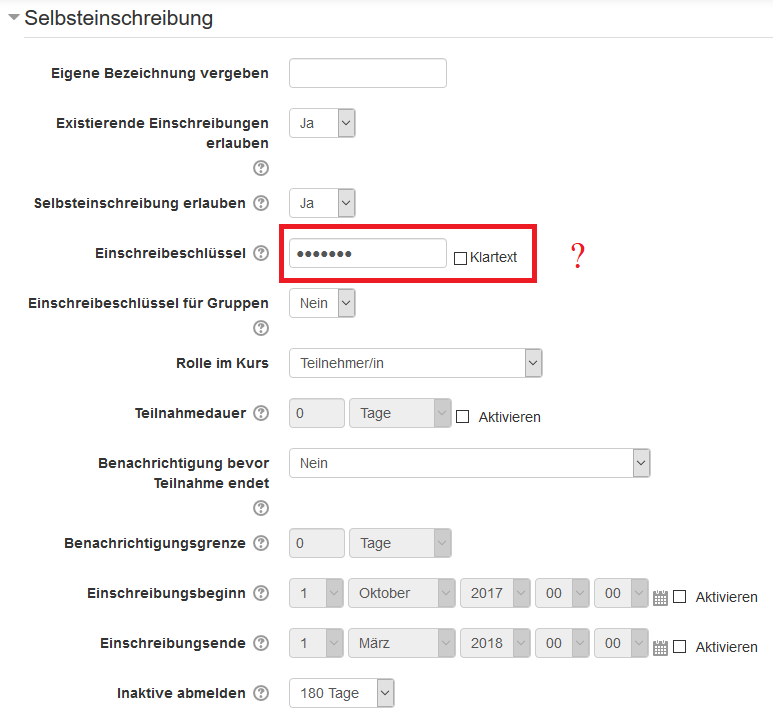
- If required, define a password or provide a start and end date. All of the empty fields are optional. If you do not want to provide any specific details, save the form, which in turn activates self-enrolment.
Please note: If you do not define a password for your course and the self-enrolment method has been activated, every person who has access to the University’s Moodle can access your course. However, the number of participants is limited to all of the persons with a valid user account issued by the University Computer Centre (i.e.: students, members of teaching staff and other staff members).
Alternatively, you can also manually grant selected persons access to your course (keyword: manual enrolment). However, the configuration is more complicated!


